Creating jobs
A job in GRBL Server is a single G-code execution targeted at a machine. Jobs are generated from an SVG (vector), a DXF drawing, an image (raster), an Excellon drill file, or a Gerber copper layer (PCB isolation), processed through an interface, optionally clipped/cropped or arranged into a grid, and queued onto one or more machines.
This page covers the one-off path — picking a file, choosing an interface, running it. For reusable batch production, see Workflow basics.
Loading files
GRBL Server picks up files from one of three places:
- Local folder — a directory on the host computer. Drag files into the UI or drop them in
%USERPROFILE%\Documents\GRBL-SERVER\local_folder\<group>. Default group isdefault. - Mediators (database) — SVGs pulled by a SQL query from an external database. Useful for production where designs are tied to orders.
- S3 / cloud storage — files in an S3-compatible bucket, browsed from File Loaders → S3. Upload, select and set up jobs there the same way as the local folder.
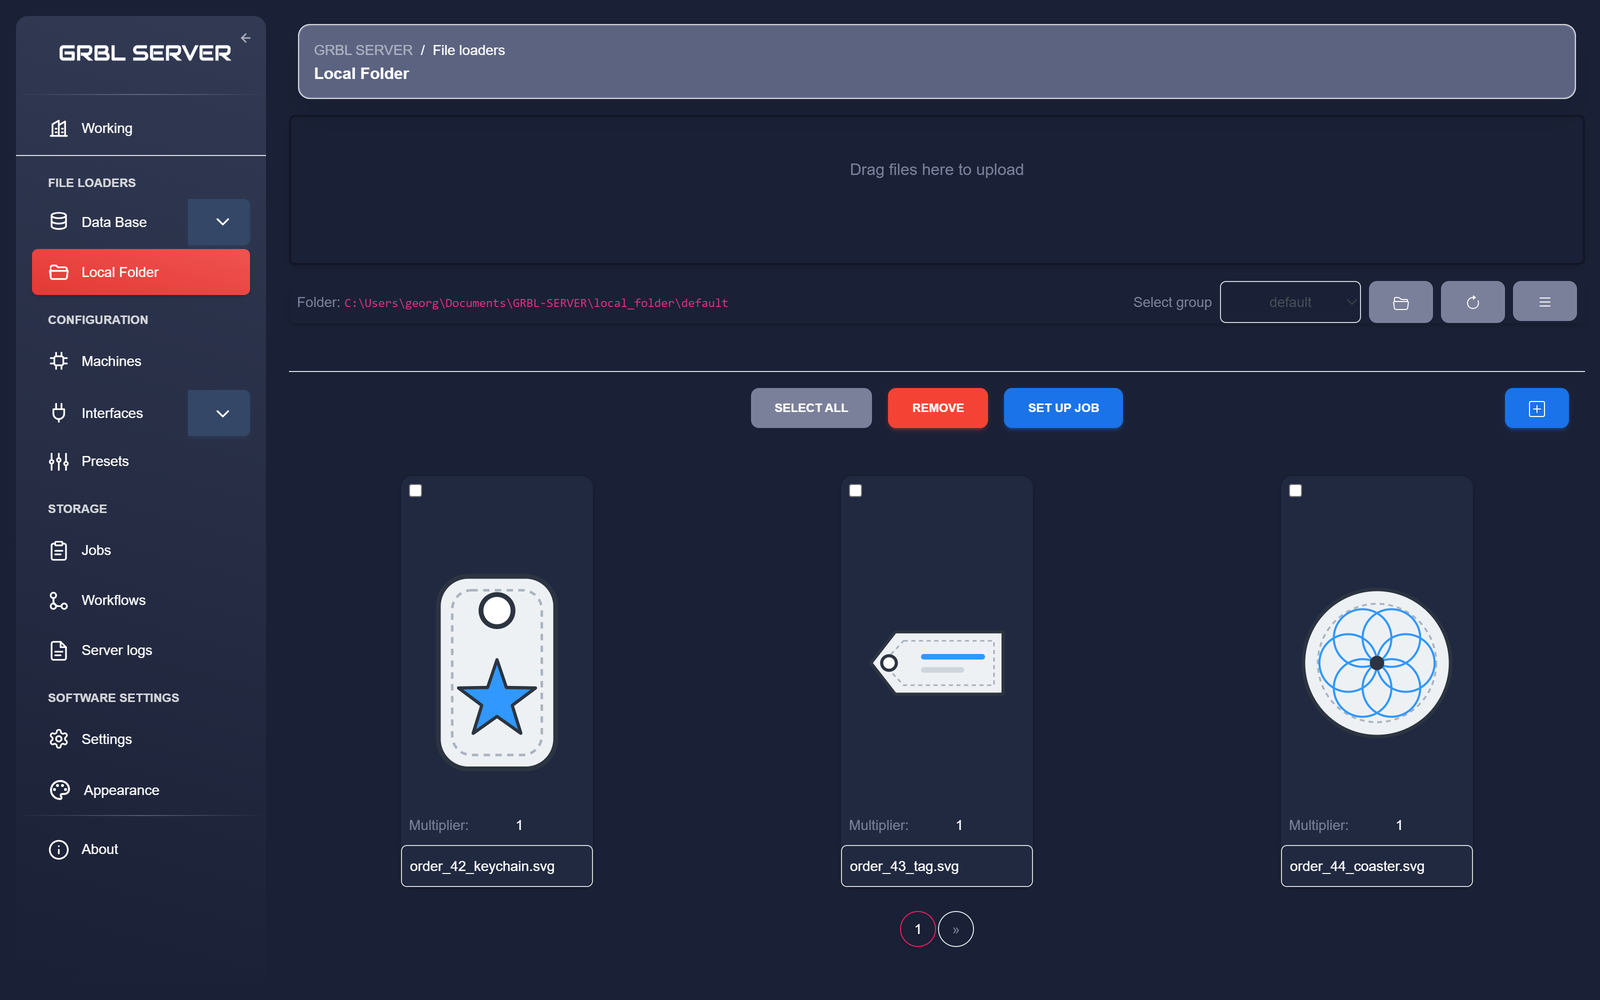
The quick path: a one-off job
- Open File Loaders → Local Folder in the sidebar.
- Drag an SVG, DXF, image, drill (DRL/XLN) or Gerber (GBR/GER/GTL/GBL) file into the upload area, or browse to it.
- Click the file thumbnail to select it (a check appears in the corner).
- Optionally set a Multiplier (how many copies of this file should go through the job).
- Click SET UP JOB.
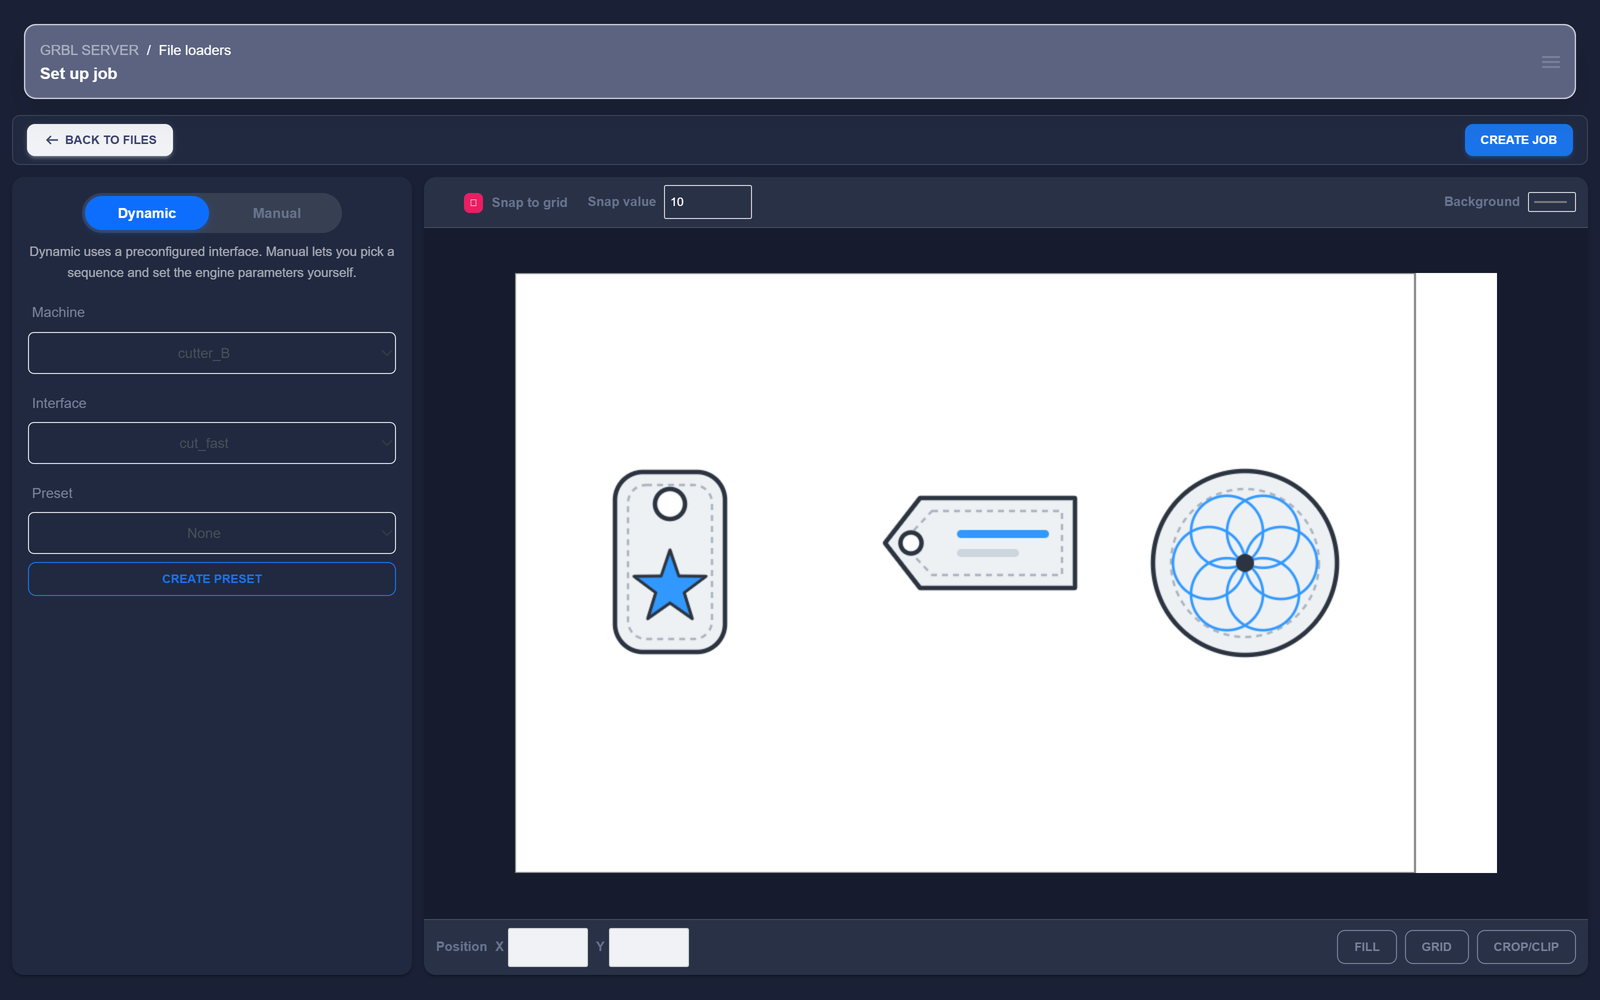
- The Set up job page opens with your files on the pre-visualizer canvas. In the settings panel on the left:
- Pick a machine — its working area becomes the bed in the pre-visualizer.
- In Dynamic mode, pick an interface (the engine parameters for this material — power, speed, passes, fill density…) and, optionally, a saved preset — or switch to Manual mode and set the engine parameters right there in the panel.
- Use the Grid and Crop/Clip buttons under the canvas to tile the job or constrain it to the material on the bed.
- Drag the files on the pre-visualizer canvas to lay them out on the bed.
- Click Create job. GRBL Server generates the G-code and the job lands in Storage → Jobs, ready to run on the machine.
Manual mode — skip the interface
When you need a quick job and don't want to create or modify an interface first, switch the Set up job page to Manual mode. The full set of engine parameters appears in the settings panel, so you can dial them in for this one job without leaving a permanent interface behind.
When to use manual mode
- A one-off prototype where you'll throw the settings away after.
- A quick test cut on scrap material to dial in a new laser or a new material.
- Trying a parameter tweak before deciding whether to save it as a real interface.
- Anything where creating a named interface would be more bookkeeping than the job is worth.
How manual mode works
- On the Set up job page, switch the mode toggle from Dynamic to Manual instead of picking a saved interface.
- The full set of engine parameters appears in the settings panel: tool type, scale, power, feed rate, pass count, laser mode (M3 / M4), fill density and direction, raster resolution, cutting depths and spindle settings for Z tools, and the rest. It's the exact same parameter set you'd see inside an interface's Engine Params dialog — and it adapts to the selected tool type.
- Configure the parameters directly in the panel for the job you're about to run.
- Pick the machine, optionally apply a grid or crop/clip as usual.
- Position the files in the pre-visualizer, then click Create job. The parameters are stored on the job record, but no interface is created or modified.
Supported file formats
Every format goes through the same pipeline — pick the file, pick the settings, get a job. You don't pick "vector mode" or "raster mode" up front:
- SVG paths, polygons, and curves are approximated into G-code moves. Transforms and groups are preserved.
- DXF drawings (CAD exports) are converted from their line, arc, and polyline entities into vector G-code moves. The output units are configurable, so a drawing made in inches or millimetres lands at the right size.
- Bitmap images (PNG, JPG) are mapped pixel-by-pixel to laser power, producing engraved fill patterns.
- SVGs that embed raster images alongside vector outlines are processed in a single job — the engine runs the raster fill where the embedded image is, then the vector pass for the surrounding paths.
- Excellon drill files (DRL, XLN) become peck-drilling programs with a bit-change pause per drill size — see Drill files.
- Gerber copper layers (GBR, GER, GTL, GBL) become PCB isolation-routing programs — see PCB isolation.
- Raw G-code files pass through untouched, so you can run programs generated elsewhere.
Filename filters in mediators & local folder
When a workflow loads from the local folder or a mediator, you can filter which files come through:
| Parameter | Effect |
|---|---|
prefix | Only files whose name starts with this string. "order_" matches order_42.svg, not logo.svg. |
suffix | Only files whose name ends with this (before the extension). "_engrave" matches order_42_engrave.svg. |
extensions | Comma-separated list. "svg, gcode" includes both. Blank = all. |
recurse | Include subfolders. |
Running, pausing, stopping
Once a job is on a machine, you control it from the Working page or the Job station view:
- Pause — sends a feed hold. The controller stays connected and the laser is off. Resume picks up where it left off.
- Stop — terminates the job and clears the queue on that machine. Use it when something has gone visibly wrong.
Job state lives on the server
You can start a job on one computer and pause it from another — the state is tracked on the server, not on the computer that submitted it. That's part of the point.
Multipliers
The Multiplier field next to each file decides how many copies of that file the job should include. Combined with a grid, it's how you produce 24 keychains from one SVG.
The Jobs page
Storage → Jobs shows every job that has been generated — running, queued, completed, errored, cancelled. Each row links to a job record with the generated G-code, original file reference, and timing.
Editing the generated G-code
From a job record you can inspect or edit the G-code directly in the built-in editor — syntax-highlighted, with line numbers, a find tool with match navigation, and go-to-line. Use it for a quick fix (tweak a feed rate, delete a stray move, add a comment) without regenerating the whole job. Very large files relax the highlighting to stay responsive, and files past the configured size limit ask for confirmation before they load.