Presets & interfaces
Presets, interfaces, sequences, and macros are the reusable settings layer in GRBL Server. They're what stop you from re-entering power / speed / passes for every job. Most workshops end up with five to ten interfaces and a couple of dozen presets — enough to cover their common materials, never enough to feel cluttered.
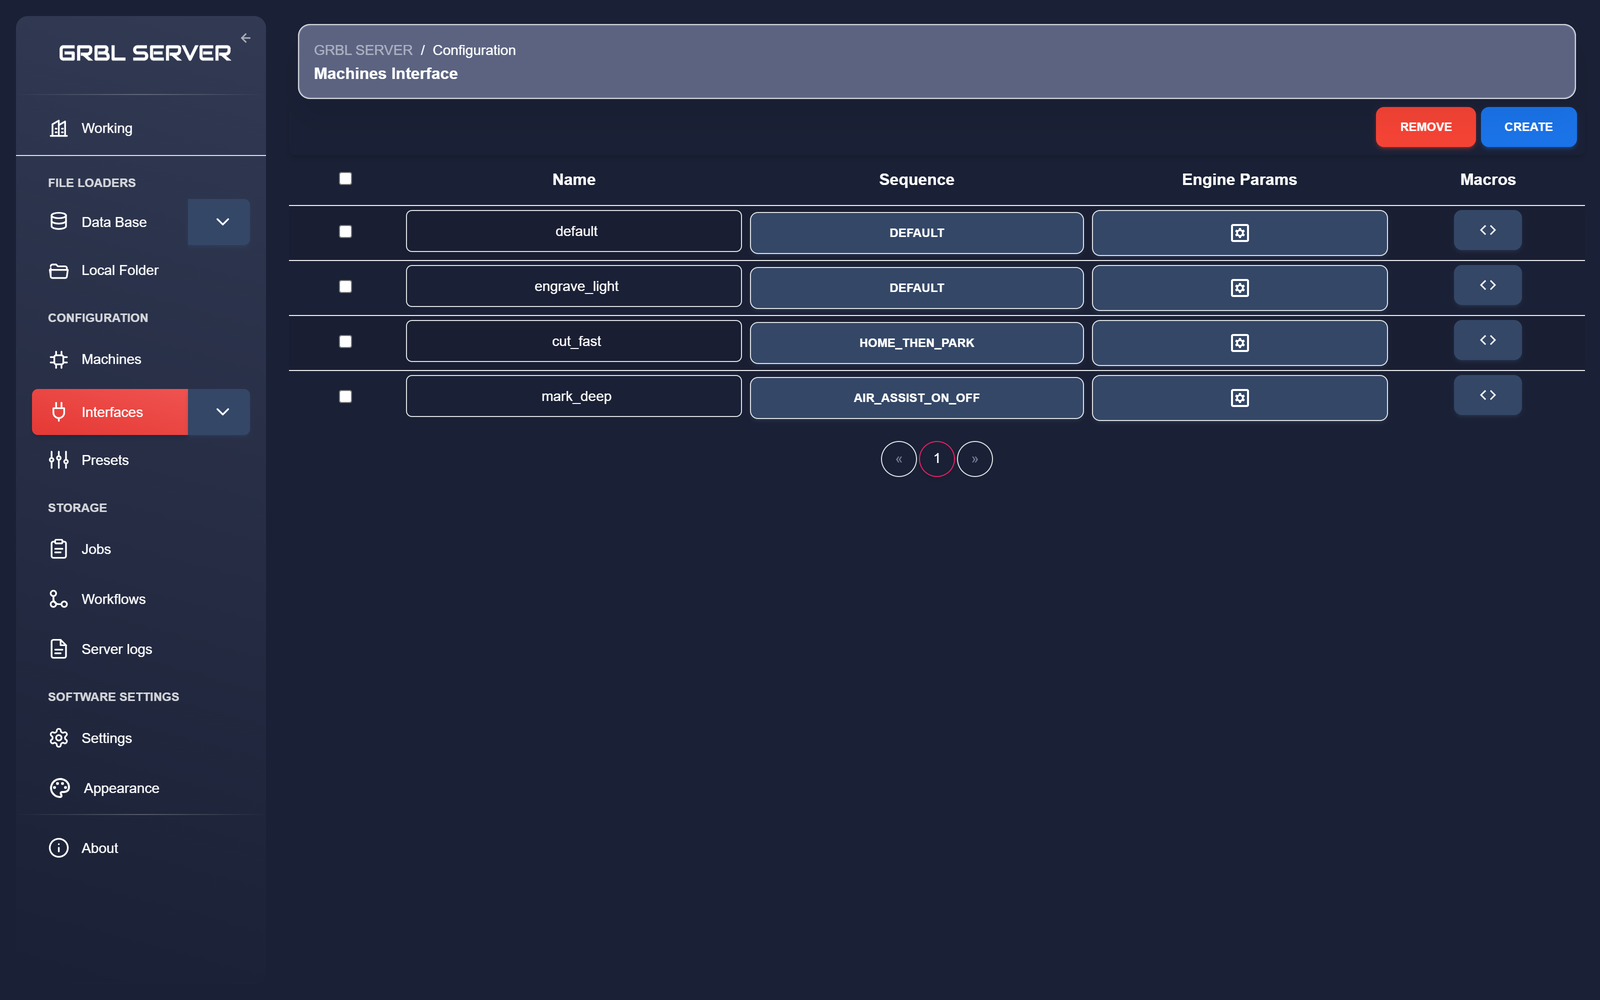
Interfaces
An interface stores the engine parameters — the settings the conversion engines use when they turn a file into G-code: tool type, scale, power range or cutting depths, feed rate, pass count, constant-burn (M3) vs dynamic (M4) laser mode, fill density and direction, and so on. Think of it like the "filament profile" in a slicer — the same SVG looks completely different on 3 mm plywood vs 0.5 mm cardboard, and that difference lives in the interface.
One interface, every format
GRBL Server picks the right engine per file — vector (SVG), DXF, raster image, Excellon drill, or Gerber copper — but they all read the same interface. You don't need a separate "vector interface" and "raster interface" for the same material — one interface covers every path.
- SVG paths are approximated into G-code moves (vector pass).
- Bitmap pixels are mapped to laser power (raster pass).
- SVGs that embed raster images alongside vector outlines are handled in a single job: the engine runs the raster fill where there's image content, and the vector pass where there are paths.
- Drill and Gerber files use the same depth, spindle and feed settings as any other spindle job, plus a small PCB-specific group.
Engine parameters
The Engine Params button on each interface row opens a dialog with the full parameter set: tool type, scale, power range, feed rate, pass count, laser mode (M3 / M4), fill density and direction, raster resolution, and the rest. These are the knobs you tune per material.
The dialog is tool-aware: the Tool group at the top decides which settings apply. Pick laser and you get power fields; pick spindle or drag and the laser fields give way to a Cutting depth & spindle group (operation, tool diameter, cut depth, depth per pass, safe Z, plunge feed, spindle RPM) and — for spindles — a PCB isolation group for Gerber jobs. Nothing is lost when you switch: hidden fields keep their values.
The everyday parameters sit up top; an Advanced group exposes the G-code dialect — custom start/end blocks, the laser-on and laser-off commands, the travel (rapid) move, coordinate precision, and raster-line options. The defaults already match the engines' built-in behaviour, so you only need the Advanced group when a particular controller wants something different.
Sequences
A sequence is the start / end G-code that wraps a job. It runs once at the beginning and once at the end of every job that uses it.
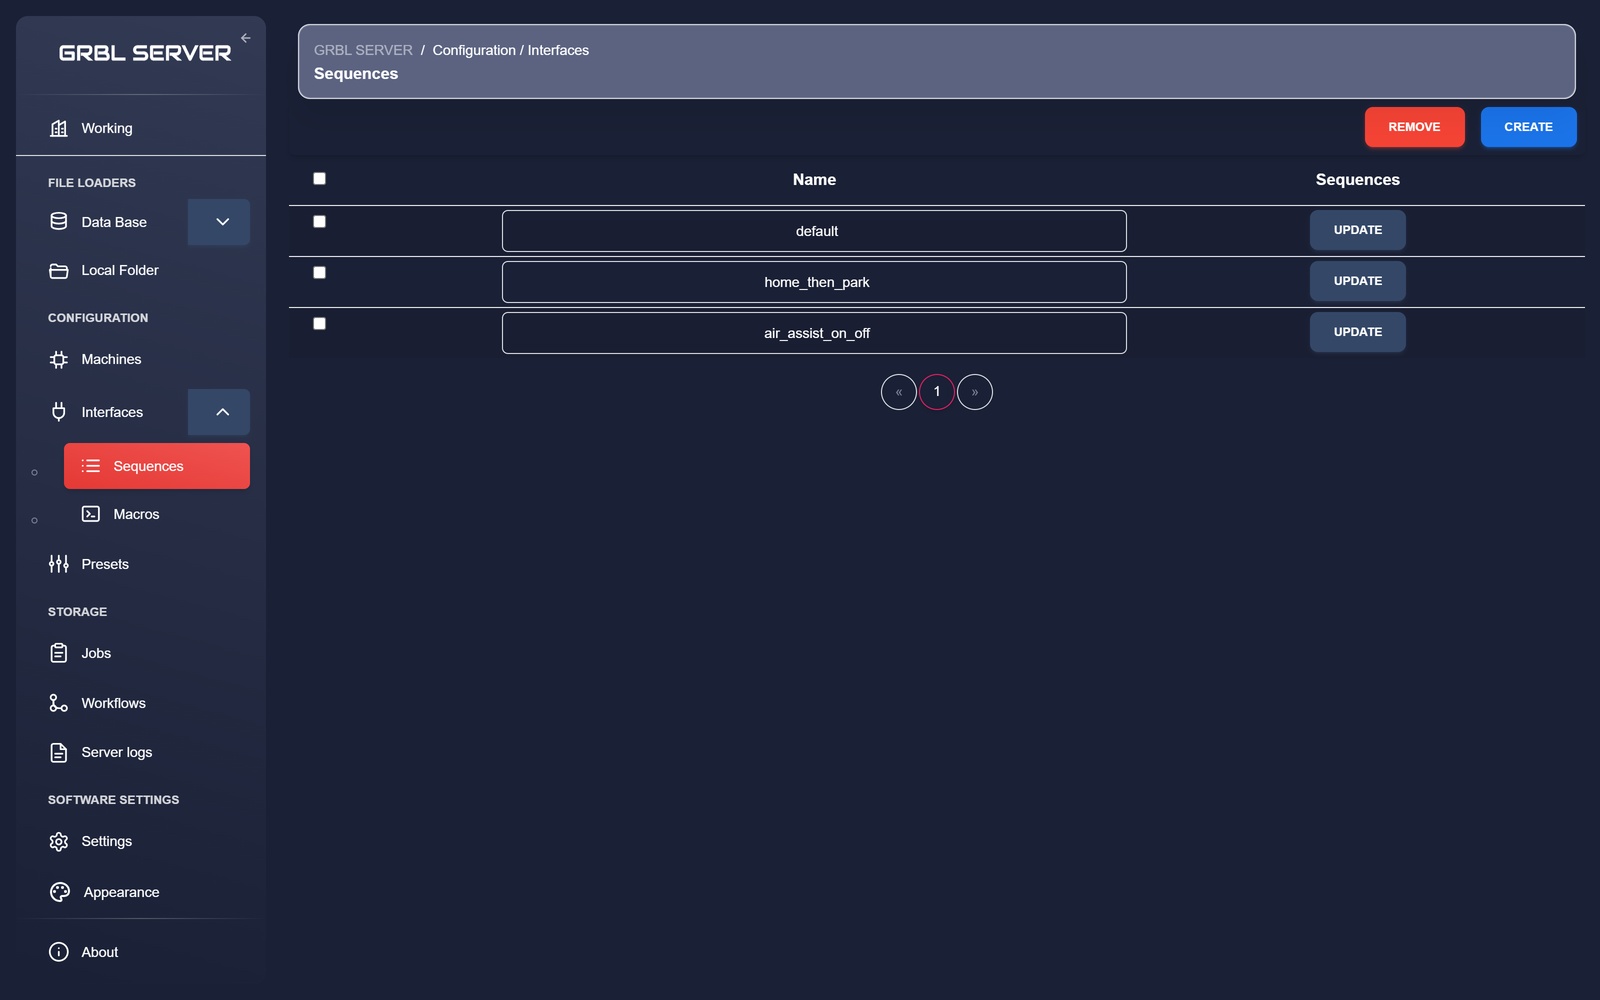
Common uses:
- Home the machine before each job (
$H). - Raise the Z axis to a safe height (
G0 Z5). - Turn an air-assist or exhaust fan on at job start and off at job end.
- Park the head at a known position when finished.
Interfaces reference a sequence by name. If you change the sequence, every interface that uses it picks up the change on the next job.
Macros
A macro is a named snippet of G-code you run on demand from the Job station view — one-click buttons for things like "focus the laser at 30 mm" or "home X only" — rather than inside every job like a sequence.
Macros are protocol-aware. When you create or edit one, you tag it with the firmware protocols it works on (GRBL, Marlin, Klipper, …). The Job station then shows a machine only the macros that match its protocol — a Klipper-only macro never appears on a GRBL laser — while a macro left untagged stays compatible with every machine.
Job presets
A job preset bundles a machine + an interface + clipping/crop settings + a pre-visualizer layout into a single reusable object. Once you've dialled in a setup that works for a material, save it as a preset and apply it in one click for future jobs.
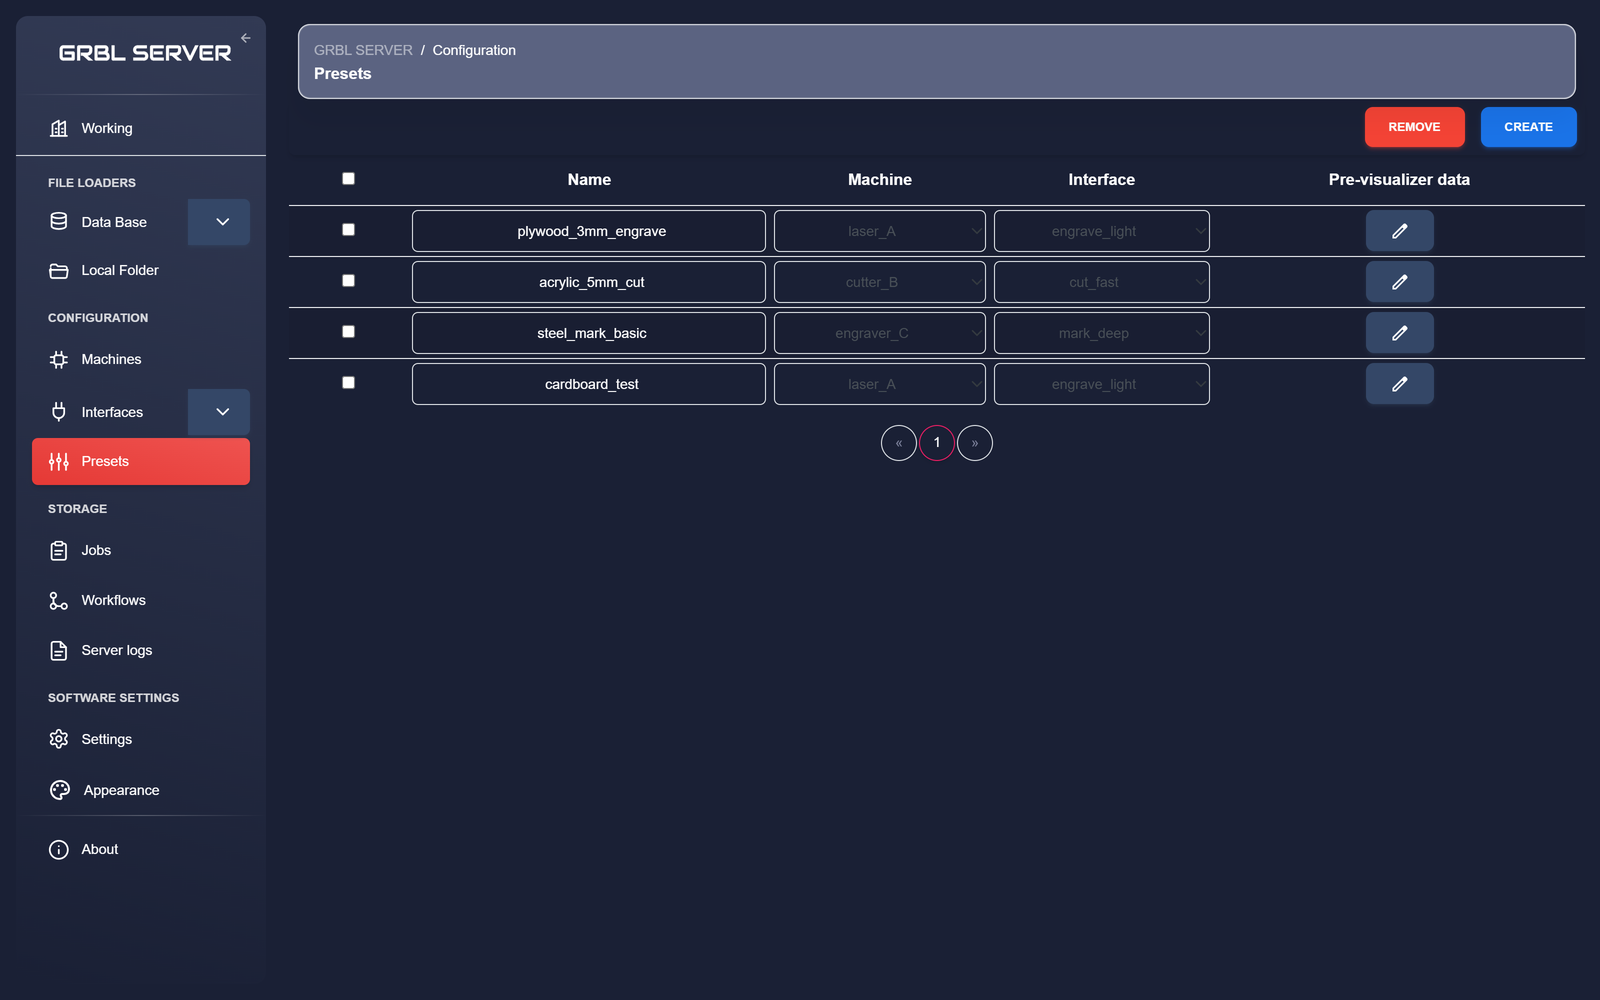
What a preset stores
- The target machine (with its working area).
- An interface (the engine parameters — tool type, power or cutting depths; covers every supported file format).
- Optional clipping or crop rules.
- The pre-visualizer canvas layout — where on the bed jobs land by default, snap-to-grid alignment, background image (e.g. a photo of the bed with a jig on it).
Creating a preset
- Open Configuration → Presets.
- Click CREATE in the top right.
- Give it a name.
{material}_{thickness}_{operation}is a good convention:plywood_3mm_engrave,acrylic_5mm_cut. - Pick the machine and interface from the dropdowns.
- Click the pencil under Pre-visualizer data to open the canvas editor and arrange the default layout / snap settings / background.
- Save. The preset is immediately available on the Set up job page and as a Preset node in workflows.
Using a preset
- In a one-off job, pick it from the Preset dropdown on the Set up job page.
- In a workflow, drop a Preset node and connect it to Setup job's
presetinput. (Doing so excludes the Interface / Grid / Clip inputs — see Setup job inputs.)
Naming conventions that scale
This is opinion, not enforced, but it ages well:
- Machines: short and lowercase.
laser_A,cutter_B,mark_D. - Interfaces: describe the parameter profile, not the material.
engrave_light,cut_fast,mill_1mm_pass,pcb_isolation. - Sequences: describe the wrapper.
home_then_park,air_assist_on_off. - Presets: describe the outcome.
plywood_3mm_engrave,steel_mark_basic.